วันจันทร์ที่ 28 พฤษภาคม พ.ศ. 2555

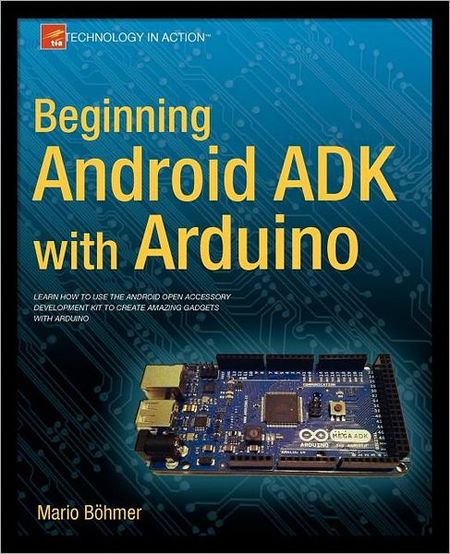
Beginning Android ADK with Arduino eBook


-->


Beginning Android ADK with Arduino eBook

Beginning Android ADK with Arduino By Mario Bohmer
2012 | 316 Pages | ISBN: 1430241977 | EPUB + PDF | 9 MB + 10 MB

Learn how to use the Android Open Accessory Development Kit to create amazing gadgets with Arduino.

Whether you're new to Arduino and Android development, or you've tinkered a bit with either one, this is the book for you. Android has always been a natural fit with Arduino projects, but now that Google has released the Android Open Accessory Development Kit (the Android ADK), combining Android with Arduino to create custom gadgets has become even easier.

Beginning Android ADK with Arduino shows how the ADK works and how it can be used with a variety of Arduino boards to create a variety of fun projects that showcase the abilities of the ADK.

Mario Bohmer will walk you through several projects, including making sounds, driving motors, and creating alarm systems, all while explaining how to use the ADK and how standard Arduino boards may differ from Google-branded Arduinos. You aren't tied to specific hardware with this book; use what you have, and this book will show you how.

What you’ll learn
• How different boards work with the ADK.
• How to create your first sketch and project.
• How to work with light and sound.
• How to work with servos and DC motors.
• How to work with photoresistors and thermistors to sense the environment.
• How to make your own capacitive touch game show buzzer.
• How to create your own camera-enabled alarm system.
 

Who this book is for
This book is for beginning Arduino and Android enthusiasts, or Arduino developers who want to try out the new Android ADK.


Introduction Android ADK

In May 2011, Google held its annual developer conference, the Google IO, to present its newest technologies to approximately 5,000 attendees. In addition to improvements in its already well-known technologies such as the Google APIs or the core search technology, Google placed the focus on two major themes: Chrome and Android. As always, the newest advances in the Android Platform were presented and discussed, but what Google announced a bit later in the Android keynote was a bit of a surprise: Google’s first standard for Android devices to communicate with external hardware. The Android Open Accessory Standard and the Accessory Development Kit (ADK) will be the key for communicating with hardware and building external accessories for Android devices. To encourage development, Google handed out ADK hardware packages to interested attendees and showed some examples of ADK projects, such as a treadmill which transmitted data to a connected Android device and a huge tilt labyrinth, which could be controlled with an Android device. Shortly after the event, the first DIY projects surfaced which already showed the great potential of the ADK.
Since I couldn’t attend the event, I had no chance to get my hands on one of those kits; at the time, there was only one distributor for the Google ADK boards and this distributor wasn’t prepared for such a big demand. That didn’t stop me from building an alternative myself and from experiencing the joy of this new field in Android development. Over time, many more distributors have produced derivatives of the original Google ADK boards, which are, for the most part, cheaper and only provide the basics to get you started hacking your project together.
You probably just want to dive right in, but first you should learn about the specifics of the ADK and set up your development environment. You wouldn’t build a house before you knew how to do it or without having the proper tools, would you?


Free Download  Beginning Android ADK with Arduino eBook

Android Developer
 http://androiddevelopersthai.blogspot.com/

Android example code 
http://androidcodeexample.blogspot.com/  -->

วันพฤหัสบดีที่ 26 เมษายน พ.ศ. 2555

Android Camera Face Detector


Android Camera Face Detector 

( ค้นหา ใบหน้า  ด้วย Android )
-->


Use  android.media.FaceDetector with onDraw method  ( ภาษาไทย ด้านล่าง )

public class FaceDetector

extends Object
java.lang.Object
   ↳ android.media.FaceDetector

Class Overview

Identifies the faces of people in a Bitmap graphic object.

Summary

Nested Classes
class FaceDetector.Face A Face contains all the information identifying the location of a face in a bitmap. 
Public Constructors
FaceDetector(int width, int height, int maxFaces)
Creates a FaceDetector, configured with the size of the images to be analysed and the maximum number of faces that can be detected.
Public Methods
int   findFaces(Bitmap bitmap, Face[] faces)
Finds all the faces found in a given Bitmap.
Protected Methods
void  finalize()
Invoked when the garbage collector has detected that this instance is no longer reachable.
[Expand]
Inherited Methods
From class java.lang.Object

Public Constructors


public FaceDetector (int width, int height, int maxFaces)

Since: API Level 1
Creates a FaceDetector, configured with the size of the images to be analysed and the maximum number of faces that can be detected. These parameters cannot be changed once the object is constructed. Note that the width of the image must be even.
Parameters
width the width of the image
height the height of the image
maxFaces the maximum number of faces to identify

Public Methods


public int findFaces (Bitmap bitmap, Face[] faces)

Since: API Level 1
Finds all the faces found in a given Bitmap. The supplied array is populated with FaceDetector.Faces for each face found. The bitmap must be in 565 format (for now).
Parameters
bitmap the Bitmap graphic to be analyzed
faces an array in which to place all found FaceDetector.Faces. The array must be sized equal to the maxFaces value set at initialization
Returns
  • the number of faces found
Throws
IllegalArgumentException if the Bitmap dimensions don't match the dimensions defined at initialization or the given array is not sized equal to the maxFaces value defined at initialization

Protected Methods


protected void finalize ()

Since: API Level 1
Invoked when the garbage collector has detected that this instance is no longer reachable. The default implementation does nothing, but this method can be overridden to free resources.
Note that objects that override finalize are significantly more expensive than objects that don't. Finalizers may be run a long time after the object is no longer reachable, depending on memory pressure, so it's a bad idea to rely on them for cleanup. Note also that finalizers are run on a single VM-wide finalizer thread, so doing blocking work in a finalizer is a bad idea. A finalizer is usually only necessary for a class that has a native peer and needs to call a native method to destroy that peer. Even then, it's better to provide an explicit close method (and implement Closeable), and insist that callers manually dispose of instances. This works well for something like files, but less well for something like a BigInteger where typical calling code would have to deal with lots of temporaries. Unfortunately, code that creates lots of temporaries is the worst kind of code from the point of view of the single finalizer thread.
If you must use finalizers, consider at least providing your own ReferenceQueue and having your own thread process that queue.
Unlike constructors, finalizers are not automatically chained. You are responsible for calling super.finalize() yourself.
Uncaught exceptions thrown by finalizers are ignored and do not terminate the finalizer thread. See Effective Java Item 7, "Avoid finalizers" for more.
Throws
Throwable

การตรวจจับใบหน้า

Nested Classes  FaceDetector.Face
เป็นข้อมูลทั้งหมด
ของใบหน้า  ประกอบด้วย ที่ระบุตำแหน่งของใบหน้า ใน ไฟล์ภาพบิตแมป


Public Constructors FaceDetector(int width, int height, int maxFaces)
เป็นการสร้าง FaceDetector ที่จะกำหนดค่าที่มีขนาดของภาพที่จะวิเคราะห์ และจำนวนสูงสุดของใบหน้าที่สามารถตรวจพบ

Public Methods  findFaces(Bitmap bitmap, Face[] faces)
 เป็น method ที่ทำหารค้นหาใบหน้าทั้งหมดที่พบใน Bitmap 

  Protected Methods  finalize()
เป็น method ที่เรียกใช้ตรวจพบว่า ทำงานได้สิ้นสุดแล้ว

Public Constructors

public FaceDetector (int width, int height, int maxFaces)
การสร้าง FaceDetector ต้องกำหนดค่าที่มีขนาดของภาพที่จะวิเคราะห์และจำนวนสูงสุด ของใบหน้าที่สามารถตรวจพบ ตัวแปรเหล่านี้จะไม่สามารถเปลี่ยนแปลงได้เมื่อสร้างวัตถุไปแล้ว

พารามิเตอร์
width : ความกว้างของภาพ
height : ความสูงของภาพ
maxFaces : จำนวนสูงสุดของใบหน้าที่ต้องการค้นหา


Public Methods

public int findFaces (Bitmap bitmap, Face[] faces)

เป็น method ที่ทำการตรวจจับใบหน้าทั้งหมดที่พบใน Bitmap จะจัดให้เป็นรูปแบบอาร์เรย์ที่ที่ FaceDetector.Faces  สามารถรองรับได้ 565 รูปแบบ
Parameters

bitmap : ไฟล์บิตแมปกราฟิกที่จะวิเคราะห์

faces  :  ใบหน้าอาร์เรย์ในการที่ FaceDetector.Faces พบทั้งหมด อาร์เรย์จะต้องเป็นขนาดเท่ากับค่า maxFaces ตั้งไว้ที่เริ่มต้น


รับเขียนโปรแกรม Android Application และสอนการเขียนโปรแกรม สอน online ได้

อดุลย์ 081-6452400  e-mail fongwe_a@hotmail.com 
สอนเขียนโปรแกรม Android Application สอนแบบ online ได้ทั่วประเทศ กำหนดเวลาเรียนได้
การเรียน Android Application แบบ online สามารถกำหนดเวลาเรียน เองได้ ตามแต่ตกลงกัน

Course
1.JAVA Programming สำหรับผู้ที่ยังไม่มีพื้นฐานทางด้าน การเขียนโปรแกรม JAVA
เรียน 6 ครั้ง ครั้งละ 1 ชั่วโมงครึ่ง  

2.Beginning Android Development เริ่มต้นการพัฒนาด้วย Android ( ต้องมีพื้นฐาน JAVA แล้ว )
เรียน 10 ครั้ง ครั้งละ 1 ชั่วโมงครึ่ง

3.Android Application สอนตามความต้องการในการเขียนโปรแกรม ใช้งานจริง เช่น โปรแกมเกม หรือ โปรแกรมใช้งานด้านต่างๆ
ระยะเวลา และ ค่าเรียน ตามแต่ความยากง่ายของโปรแกรม ซึ่งอาจจะรวมสอน JAVA Programming ด้วยสำหรับผู้เริ่มต้นเลย

more info about Android Development
http://androiddevelopersthai.blogspot.com/

Android example code 
http://androidcodeexample.blogspot.com/


วันพฤหัสบดีที่ 15 มีนาคม พ.ศ. 2555

SMS to Braille Character Code with IOIO Board


ADT Program test on Eclipse.


Test Program with IOIO Board and LG Optimus Black P970.

SMS to Braille Character Code with IOIO Board


Hardware IOIO Board


More info
IOIO Board over Bluetooth
IOIO Bluetooth Control Devices
IOIO RC Control


Information for Android Development http://developer.android.com/reference/android/telephony/SmsManager.html

public final class

SmsManager

extends Object
java.lang.Object
   ↳ android.telephony.SmsManager

Class Overview

Manages SMS operations such as sending data, text, and pdu SMS messages. Get this object by calling the static method SmsManager.getDefault().

Summary

Constants
int RESULT_ERROR_GENERIC_FAILURE Generic failure cause
int RESULT_ERROR_NO_SERVICE Failed because service is currently unavailable
int RESULT_ERROR_NULL_PDU Failed because no pdu provided
int RESULT_ERROR_RADIO_OFF Failed because radio was explicitly turned off
int STATUS_ON_ICC_FREE Free space (TS 51.011 10.5.3 / 3GPP2 C.S0023 3.4.27).
int STATUS_ON_ICC_READ Received and read (TS 51.011 10.5.3 / 3GPP2 C.S0023 3.4.27).
int STATUS_ON_ICC_SENT Stored and sent (TS 51.011 10.5.3 / 3GPP2 C.S0023 3.4.27).
int STATUS_ON_ICC_UNREAD Received and unread (TS 51.011 10.5.3 / 3GPP2 C.S0023 3.4.27).
int STATUS_ON_ICC_UNSENT Stored and unsent (TS 51.011 10.5.3 / 3GPP2 C.S0023 3.4.27).
Public Methods
ArrayList<String> divideMessage(String text)
Divide a message text into several fragments, none bigger than the maximum SMS message size.
static SmsManager getDefault()
Get the default instance of the SmsManager
void sendDataMessage(String destinationAddress, String scAddress, short destinationPort, byte[] data, PendingIntent sentIntent, PendingIntent deliveryIntent)
Send a data based SMS to a specific application port.
void sendMultipartTextMessage(String destinationAddress, String scAddress, ArrayList<String> parts, ArrayList<PendingIntent> sentIntents, ArrayList<PendingIntent> deliveryIntents)
Send a multi-part text based SMS.
void sendTextMessage(String destinationAddress, String scAddress, String text, PendingIntent sentIntent, PendingIntent deliveryIntent)
Send a text based SMS.
[Expand]
Inherited Methods
From class java.lang.Object

Constants


public static final int RESULT_ERROR_GENERIC_FAILURE

Since: API Level 4
Generic failure cause
Constant Value: 1 (0x00000001)

public static final int RESULT_ERROR_NO_SERVICE

Since: API Level 4
Failed because service is currently unavailable
Constant Value: 4 (0x00000004)

public static final int RESULT_ERROR_NULL_PDU

Since: API Level 4
Failed because no pdu provided
Constant Value: 3 (0x00000003)

public static final int RESULT_ERROR_RADIO_OFF

Since: API Level 4
Failed because radio was explicitly turned off
Constant Value: 2 (0x00000002)

public static final int STATUS_ON_ICC_FREE

Since: API Level 4
Free space (TS 51.011 10.5.3 / 3GPP2 C.S0023 3.4.27).
Constant Value: 0 (0x00000000)

public static final int STATUS_ON_ICC_READ

Since: API Level 4
Received and read (TS 51.011 10.5.3 / 3GPP2 C.S0023 3.4.27).
Constant Value: 1 (0x00000001)

public static final int STATUS_ON_ICC_SENT

Since: API Level 4
Stored and sent (TS 51.011 10.5.3 / 3GPP2 C.S0023 3.4.27).
Constant Value: 5 (0x00000005)

public static final int STATUS_ON_ICC_UNREAD

Since: API Level 4
Received and unread (TS 51.011 10.5.3 / 3GPP2 C.S0023 3.4.27).
Constant Value: 3 (0x00000003)

public static final int STATUS_ON_ICC_UNSENT

Since: API Level 4
Stored and unsent (TS 51.011 10.5.3 / 3GPP2 C.S0023 3.4.27).
Constant Value: 7 (0x00000007)

Public Methods


public ArrayList<String> divideMessage (String text)

Since: API Level 4
Divide a message text into several fragments, none bigger than the maximum SMS message size.
Parameters
text the original message. Must not be null.
Returns
  • an ArrayList of strings that, in order, comprise the original message

public static SmsManager getDefault ()

Since: API Level 4
Get the default instance of the SmsManager
Returns
  • the default instance of the SmsManager

public void sendDataMessage (String destinationAddress, String scAddress, short destinationPort, byte[] data, PendingIntent sentIntent, PendingIntent deliveryIntent)

Since: API Level 4
Send a data based SMS to a specific application port.
Parameters
destinationAddress the address to send the message to
scAddress is the service center address or null to use the current default SMSC
destinationPort the port to deliver the message to
data the body of the message to send
sentIntent if not NULL this PendingIntent is broadcast when the message is successfully sent, or failed. The result code will be Activity.RESULT_OK for success, or one of these errors:
RESULT_ERROR_GENERIC_FAILURE
RESULT_ERROR_RADIO_OFF
RESULT_ERROR_NULL_PDU
For RESULT_ERROR_GENERIC_FAILURE the sentIntent may include the extra "errorCode" containing a radio technology specific value, generally only useful for troubleshooting.
The per-application based SMS control checks sentIntent. If sentIntent is NULL the caller will be checked against all unknown applications, which cause smaller number of SMS to be sent in checking period.
deliveryIntent if not NULL this PendingIntent is broadcast when the message is delivered to the recipient. The raw pdu of the status report is in the extended data ("pdu").
Throws
IllegalArgumentException if destinationAddress or data are empty

public void sendMultipartTextMessage (String destinationAddress, String scAddress, ArrayList<String> parts, ArrayList<PendingIntent> sentIntents, ArrayList<PendingIntent> deliveryIntents)

Since: API Level 4
Send a multi-part text based SMS. The callee should have already divided the message into correctly sized parts by calling divideMessage.
Parameters
destinationAddress the address to send the message to
scAddress is the service center address or null to use the current default SMSC
parts an ArrayList of strings that, in order, comprise the original message
sentIntents if not null, an ArrayList of PendingIntents (one for each message part) that is broadcast when the corresponding message part has been sent. The result code will be Activity.RESULT_OK for success, or one of these errors:
RESULT_ERROR_GENERIC_FAILURE
RESULT_ERROR_RADIO_OFF
RESULT_ERROR_NULL_PDU
For RESULT_ERROR_GENERIC_FAILURE each sentIntent may include the extra "errorCode" containing a radio technology specific value, generally only useful for troubleshooting.
The per-application based SMS control checks sentIntent. If sentIntent is NULL the caller will be checked against all unknown applications, which cause smaller number of SMS to be sent in checking period.
deliveryIntents if not null, an ArrayList of PendingIntents (one for each message part) that is broadcast when the corresponding message part has been delivered to the recipient. The raw pdu of the status report is in the extended data ("pdu").
Throws
IllegalArgumentException if destinationAddress or data are empty

public void sendTextMessage (String destinationAddress, String scAddress, String text, PendingIntent sentIntent, PendingIntent deliveryIntent)

Since: API Level 4
Send a text based SMS.
Parameters
destinationAddress the address to send the message to
scAddress is the service center address or null to use the current default SMSC
text the body of the message to send
sentIntent if not NULL this PendingIntent is broadcast when the message is successfully sent, or failed. The result code will be Activity.RESULT_OK for success, or one of these errors:
RESULT_ERROR_GENERIC_FAILURE
RESULT_ERROR_RADIO_OFF
RESULT_ERROR_NULL_PDU
For RESULT_ERROR_GENERIC_FAILURE the sentIntent may include the extra "errorCode" containing a radio technology specific value, generally only useful for troubleshooting.
The per-application based SMS control checks sentIntent. If sentIntent is NULL the caller will be checked against all unknown applications, which cause smaller number of SMS to be sent in checking period.
deliveryIntent if not NULL this PendingIntent is broadcast when the message is delivered to the recipient. The raw pdu of the status report is in the extended data ("pdu").
Throws
IllegalArgumentException if destinationAddress or text are empty 


รับเขียนโปรแกรม Android Application และสอนการเขียนโปรแกรม สอน online ได้  
อดุลย์ 081-6452400 e-mail fongwe_a@hotmail.com
สอนเขียนโปรแกรม Android Application สอนแบบ online ได้ทั่วประเทศ กำหนดเวลาเรียนได้
การเรียน Android Application แบบ online สามารถกำหนดเวลาเรียน เองได้ ตามแต่ตกลงกัน

Course
1.JAVA Programming สำหรับผู้ที่ยังไม่มีพื้นฐานทางด้าน การเขียนโปรแกรม JAVA
เรียน 6 ครั้ง ครั้งละ 1 ชั่วโมงครึ่ง  ราคา 2000 บาท

2.Beginning Android Development เริ่มต้นการพัฒนาด้วย Android ( ต้องมีพื้นฐาน JAVA แล้ว )
เรียน 10 ครั้ง ครั้งละ 1 ชั่วโมงครึ่ง ราคา 4000 บาท

3.Android Application สอนตามความต้องการในการเขียนโปรแกรม ใช้งานจริง เช่น โปรแกมเกม หรือ โปรแกรมใช้งานด้านต่างๆ
ระยะเวลา และ ค่าเรียน ตามแต่ความยากง่ายของโปรแกรม ซึ่งอาจจะรวมสอน JAVA Programming ด้วยสำหรับผู้เริ่มต้นเลย


more info about Android Development
http://androiddevelopersthai.blogspot.com/

Android example code 
http://androidcodeexample.blogspot.com/


วันจันทร์ที่ 20 กุมภาพันธ์ พ.ศ. 2555

Android TCP/IP Server Client control IOIO Board

Android TCP/IP Server Client control IOIO Board


-->


public class ServerSocket  ( information form Android Developers )

extends Object
java.lang.Object
   ↳ java.net.ServerSocket
Known Direct Subclasses

Class Overview

This class represents a server-side socket that waits for incoming client connections. A ServerSocket handles the requests and sends back an appropriate reply. The actual tasks that a server socket must accomplish are implemented by an internal SocketImpl instance. 


public class

Socket

extends Object
java.lang.Object
   ↳ java.net.Socket
Known Direct Subclasses

Class Overview

Provides a client-side TCP socket.


รับเขียนโปรแกรม Android Application และสอนการเขียนโปรแกรม สอน online ได้
อดุลย์ 081-6452400  e-mail fongwe_a@hotmail.com
สอนเขียนโปรแกรม Android Application สอนแบบ online ได้ทั่วประเทศ กำหนดเวลาเรียนได้
การเรียน Android Application แบบ online สามารถกำหนดเวลาเรียน เองได้ ตามแต่ตกลงกัน

Course
1.JAVA Programming สำหรับผู้ที่ยังไม่มีพื้นฐานทางด้าน การเขียนโปรแกรม JAVA
เรียน 6 ครั้ง ครั้งละ 1 ชั่วโมงครึ่ง 

2.Beginning Android Development เริ่มต้นการพัฒนาด้วย Android ( ต้องมีพื้นฐาน JAVA แล้ว )
เรียน 10 ครั้ง ครั้งละ 1 ชั่วโมงครึ่ง 

3.Android Application สอนตามความต้องการในการเขียนโปรแกรม ใช้งานจริง เช่น โปรแกมเกม หรือ โปรแกรมใช้งานด้านต่างๆ
ระยะเวลา และ ค่าเรียน ตามแต่ความยากง่ายของโปรแกรม ซึ่งอาจจะรวมสอน JAVA Programming ด้วยสำหรับผู้เริ่มต้นเลย

more info about Android Development
http://androiddevelopersthai.blogspot.com/

Android example code 
http://androidcodeexample.blogspot.com/

ติดต่อ amphancm@gmail.com


วันพุธที่ 1 กุมภาพันธ์ พ.ศ. 2555

Beginning Android Training สอน Android รับเขียนโปรแกรม

สอนเขียน Android App สอนแบบ online สอนสด ตัวต่อตัว หรือ เป็นกลุ่ม ได้ทั่วประเทศ กำหนดเวลาเรียนได้
การเรียน เขียน Android App แบบ online สามารถกำหนดเวลาเรียน เองได้ ตามแต่ตกลงกัน
( รับสอน นอกสถานที่ แบบเป็น กลุ่ม ทั่วประเทศ )


VDO บันทึก Android Training Course แบบ Online 


Part 1-1
-->


Part 1-2


Part 1-3


Part 1-4


Part 1-5


รับเขียนโปรแกรม Android Application และสอนการเขียนโปรแกรม สอน online ได้

อดุลย์ 081-6452400  e-mail amphancm@gmail.com


รับสอนเขียน Android App สอนแบบ online สอนสด ตัวต่อตัว หรือ เป็นกลุ่ม ได้ทั่วประเทศ กำหนดเวลาเรียนได้
การเรียน เขียน Android App แบบ online สามารถกำหนดเวลาเรียน เองได้ ตามแต่ตกลงกัน
( รับสอน นอกสถานที่ แบบเป็น กลุ่ม ทั่วประเทศ )

แต่ละ Course ขึ้นอยู่กับพื้นฐานที่มี นะครับ

Course
1.JAVA Programming สำหรับผู้ที่ยังไม่มีพื้นฐานทางด้าน การเขียนโปรแกรม JAVA
เรียน 3-4 ครั้ง ครั้งละ 2 ชั่วโมง

2.Beginning Android Development เริ่มต้นการพัฒนาด้วย Android ( ต้องมีพื้นฐาน JAVA แล้ว )
เรียน 5-7 ครั้ง ครั้งละ 2 ชั่วโมง

3.Android Application สอนตามความต้องการในการเขียนโปรแกรม ใช้งานจริง เช่น โปรแกรมใช้งานด้านต่างๆ
ระยะเวลา และ ค่าเรียน ตามแต่ความยากง่ายของโปรแกรม ซึ่งอาจจะรวมสอน JAVA Programming ด้วยสำหรับผู้เริ่มต้นเลย

บรรยากาศ การสอนเขียน Android

สอน Android รับเขียนโปรแกรม


My Website
email : info@softpowergroup.net   Tel .081-6452400

more info about Android Development

Android example code 


วันอังคารที่ 31 มกราคม พ.ศ. 2555

Object Oriented Java Programming Part2

Object Oriented Java Programming Part2


การเขียนโปรแกรมภาษาจาวาเชิงออปเจ็ค Object Oriented Java Programming
                วัตถุประสงค์
Ø อธิบายเมธอด และการเรียกใช้เมธอด
Ø อธิบายคีย์เวิร์ดที่ใช้เป็น modifier ของเมธอด
Ø แนะนำการเขียนโปรแกรมภาษาจาวาเชิงออปเจ็ค
Ø อธิบายคุณลักษณะเด่นของโปรแกรมเชิงออปเจ็ค
Ø อธิบายความหมายของ Constructor

การเขียนโปรแกรมภาษาจาวาเชิงออปเจ็ค
Ø ตัวอย่างโปรแกรมในบทที่ผ่านาจะเขียนทุกคำสั่งอยู่ภายในเมธอดที่ชื่อ main ( ) ซึ่งไม่ได้ใช้หลักการเชิงออปเจ็คและไม่เหมาะที่จะนำไปใช้ในทางปฏิบัติเมื่อโปรแกรมมีขนาดใหญ่ขึ้น
Ø การเขียนโปรแกรมเชิงออปเจ็คที่ดีต้องมีการกำหนดเมธอดต่างๆให้กับคลาส

รูปแบบการเรียกใช้เมธอด
Ø รูปแบบของคำสั่งที่มีการเรียกใช้เมธอดเป็นดังนี้
Obj.methodName ([arguments])  ;
Ø arguments อาจจะเป็นข้อมูลค่าคงที่หรือตัวแปร
Ø ชนิดข้อมูลของ arguments ที่ใช้ในการเรียกเมธอด จะต้องสอดคล้องกันกับชนิดข้อมูลของ arguments ของเมธอด

การเรียกใช้เมธอด
Ø เมธอดที่กำหนดขึ้นในคลาสใดๆสามารถเรียกใช้งานได้สองรูปแบบคือ
·       การเรียกใช้งานจากคลาสที่ต่างกัน
·       การเรียกใช้งานภายในคลาสเดียวกัน
Ø การเรียกใช้เมธอดจากคลาสที่ต่างกัน จะต้องมีการสร้างออปเจ็คของคลาส ที่มีคลาสที่มีเมธอดที่จะถูกเรียกใช้งานก่อน จึงจะสามารถเรียกใช้เมธอดได้
Ø การเรียกใช้เมธอดในคลาสเดียวกัน สามารถทำได้โดยไม่จำเป็นต้องสร้างออปเจ็คของคลาสขึ้นมาก่อน และสามารถเรียกใช้เมธอดได้ทุกเมธอด

การส่งผ่าน argument
Ø กรณีที่เมธอดมี argument ที่จะรับค่าเพื่อนำไปใช้ในเมธอด อาทิเช่น
Public void setGPA(double GPA)                   {
                .  .   .
}
Ø คำสั่งที่เรียกใช้เมธอดนี้ จะต้องส่ง argument ที่มีชนิดข้อมูลเป็น double ไปพร้อมกับชื่อเมธอด เช่น setGPA(3.0)  ;

Argument ของเมธอด
Ø Argument  ของเมธอดจะมีชนิดข้อมูลเป็นสองแบบตามชนิดข้อมูลของตัวแปรดังนี้
·       argument  ที่มีชนิดข้อมูลแบบพื้นฐาน
·       argument  ที่มีชนิดข้อมูลแบบอ้างอิง
Ø ในกรณีของ argument ที่มีชนิดข้อมูลแบบพื้นฐาน เราสามารถที่จะส่งค่าคงที่ข้อมูล ตัวแปร หรือนิพจน์ให้กับ argument ได้ ตัวอย่างเช่น
·       ค่าคงที่ข้อมูล เช่น
s1.setGPA (3.0)  ;
·       ตัวแปร เช่น
double x = 3.0  ;
·       นิพจน์ เช่น
s1.setGPA (3.0 + 0.05)   ;
               

                argument ที่มีชนิดข้อมูลแบบอ้างอิง
Ø เราจะต้องส่งออปเจ็คที่มีชนิดข้อมูลที่สอดคล้องไปเท่านั้น
Ø ยกเว้นกรณีที่ argument นั้นมีชนิดข้อมูลเป็น String ซึ่งในกรณีนี้จะสามารถส่งข้อมูลค่าคงที่ได้

ชนิดข้อมูลและจำนวนของ argument
Ø ชนิดข้อมูลของ argument ที่จะส่งผ่านไปยังเมธอดไม่จำเป็นที่จะต้องเป็นชนิดข้อมูลเดียวกัน แต่ต้องเป็นชนิดข้อมูลที่สามารถแปลงข้อมูลให้กว้างขึ้นได้โดยอัตโนมัติ
Ø เมธอดใดๆอาจมี argument สำหรับค่ามากกว่าหนึ่งตัว แต่การเรียกใช้เมธอดเหล่านี้จะต้องส่ง argument ที่มีชนิดข้อมูลที่สอดคล้องกันและมีจำนวนเท่ากัน

การเปลี่ยนแปลงค่าของ argument
Ø การส่ง argument ที่มีชนิดข้อมูลเป็นแบบพื้นฐาน หากมีการเปลี่ยนแปลงค่าของ argument ภายในเมธอดที่ถูกเรียกใช้งาน จะไม่มีผลทำให้ค่าของ argument ที่ส่งไปเปลี่ยนค่าไปด้วย
Ø การส่ง argument ที่มีชนิดข้อมูลเป็นแบบอ้างอิง จะเป็นการส่งตำแหน่งอ้างอิงของออปเจ็คไปให้เมธอดที่ถูกเรียกใช้งาน ดังนั้นการเปลี่ยนแปลงค่าของคุณลักษณะของออปเจ็คจะมีผลทำให้ค่าของคุณลักษณะของออปเจ็คที่ส่งไปเปลี่ยนไปด้วย

การรับค่าที่ส่งกลับมาจากเมธอด
Ø เมธอดใดๆของคลาสสามารถที่จะส่งค่าที่ส่งกลับมาได้ ซึ่งชนิดข้อมูลของค่าที่จะส่งกลับอาจเป็นชนิดข้อมูลแบบพื้นฐาน หรือเป็นชนิดข้อมูลแบบอ้างอิง
Ø เมธอดที่มีค่าจะส่งกลับมาจะต้องมีคำสั่ง return ซึ่งจะระบุค่าที่ส่งกลับโดยมีรูปแบบดังนี้
return value ;
Ø คำสั่งที่เรียกใช้เมธอด อาจจะรับค่าที่ส่งกลับมาเก็บไว้ในตัวแปรหรือเป็นตัวถูดำเนินการในนิพจน์ ตัวอย่างเช่น
double  d  =  getGPA ()  ;
System.out.println (“GPA: ” +getGPA () )  ;
               
modifier  ของเมธอด
Ø Modifier ของเมธอดประกอบด้วย
·       access modifier
·       static
·       abstract
·       synchronized
·       final
Ø access modifier ใช้เพื่อระบุระดับการเข้าถึง โดยมีคีย์เวิร์ดต่างๆดังนี้
·       public
·       protected
·       private
·       default (ไม่ระบุคีย์เวิร์ดใดๆ)
เมธอดแบบ static
Ø เมธอดโดยทั่วไปจะมี modifier เป็นแบบ  non-static
Ø เมธอดที่มี modifier เป็นแบบ static จะสามารถถูกเรียกใช้งานโดยใช้ชื่อคลาสได้เลยไม่จำเป็นต้องสร้างออปเจ็คชองคลาสนั้นขึ้นมาก่อน ซึ่งมีรูปแบบดังนี้
className.methodName ()  ;
Ø ตัวอย่างเช่น เมธอดทุกเมธอดในคลาส Match เป็นแบบ static ดังนั้นการเรียกใช้งานทุกเมธอดในคลาสสามารถทำได้ เช่น
Match.sqrt (4)  ;
Ø เมธอดแบบ static จะไม่สามารถเรียกใช้เมธอดหรือตัวแปรของออปเจ็คได้โดยตรง

คุณลักษณะแบบ static
Ø ตัวแปรคลาสที่มี modifier เป็นแบบ static จะเป็นตัวแปรของคลาสที่ใช้ร่วมกันสำหรับทุกออปเจ็ค
Ø ตัวแปรที่มี modifier เป็นแบบ static จะสามารถถูกเรียกใช้งานโดยใช้ชื่อคลาสได้เลย ไม่จำเป็นต้องสร้างออปเจ็คของคลาสขึ้นมาก่อน เช่นเดียวกันกับเมธอดที่มี modifier เป็นแบบ static
เมธอดแบบ Overloaded
Ø ภาษาจาวาอนุญาตให้คลาสใดๆมีเมธอดที่มีชื่อเดียวกันมากกว่าหนึ่งเมธอดได้ แต่เมธอดเหล่านั้นจะต้องมีจำนวนหรือชนิดข้อมูลของ argument ที่ต่างกัน
Ø ตัวอย่างต่อไปนี้เป็นการเขียนเมธอดแบบ Overloaded
Public void setDetails (String ID , String  n)  {
}
Public void setDetails (String ID , double GPA)  {
}
Public void setDetails (double GPA , String  n)  {
}
Ø ตัวอย่างต่อไปนี้เป็นการเขียนเมธอดแบบ Overloaded ที่ไม่ถูกต้อง

Public void setDetails (string ID , double  GPA)  {
}
Public void setDetails (String n , double  GPA)  {
}
                คีย์เวิร์ด this
Ø คีย์เวิร์ด this หมายถึงออปเจ็คของตัวเอง
Ø เราสามารถที่จะเรียกใช้เมธอดหรือคุณลักษณะภายในคลาสได้โดยใช้คีย์เวิร์ด this ซึ่งมีรูปแบบดังนี้
this.methodName () ;
this.attributeName
Ø โดยทั่วไปเราจะไม่ใช้คีย์เวิร์ด this ในคำสั่ง ยกเว้นในกรณีที่จำเป็น

การเขียนโปรแกรมโดยใช้หลักการของการห่อหุ้ม
Ø คุณลักษณะเด่นของโปรแกรมเชิงออปเจ็คมีอยู่สามอย่างคือ การห่อหุ้ม การสืบทอด และการมีได้หลายรูปแบบ
Ø ข้อดีของการห่อหุ้มประการหนึ่งคือการซ่อนเร้นข้อมูล
Ø หลักการห่อหุ้มของออปเจ็คทำได้ดังนี้
·       กำหนดคุณลักษณะของออปเจ็คให้มี mofifier เป็น private เพื่อซ่อนไม่ให้ออปเจ็คอื่นๆเรียกใช้ได้
·       กำหนดเมธอดของออปเจ็คที่ต้องการให้ออปเจ็คอื่นๆเรียกใช้ให้มี modifile เป็น public

เมธอดแบบ setter
Ø เมธอดแบบ accessor แบ่งออกเป็นสองประเภทคือ
·       เมธอดแบบ setter
·       เมธอดแบบ getter
Ø เมธอดแบบ setter จะใช้ในการกำหนดค่าของคุณลักษณะ
Ø โดยทั่วไปชื่อขอเมธอดแบบ setter จะขึ้นต้นด้วยคำว่า set แล้วตามด้วยชื่อของคุณลักษณะ ซึ่งมีรูปแบบดังนี้
public  void  setAttributeName (dataType  arg)   {
                attributeName  = arg  ;
}

                เมธอดแบบ getter
Ø เมธอดแบบ getter จะให้เรียกค่าของคุณลักษณะ
Ø โดยทั่วไปชื่อของเมธอดแบบ getter จะขึ้นต้นด้วยคำว่า get แล้วตามด้วยชื่อของคุณลักษณะ ซึ่งมีรูปแบบดังนี้
Public  dataType  getAttributeName ()   {
                Return  attributeName  ;
}


                การเขียนโปรแกรมด้วยใช้หลักการของการสืบทอด
Ø ข้อดีของการสืบทอดคือ การนำคลาสที่มีแล้วมาใช้ใหม่โดยการเพิ่มเติมคุณลักษณะหรือเมธอดในคลาสใหม่
Ø การพัฒนาคลาสขึ้นใหม่ที่ชื่อ GradStudent สามารถที่จะเลือกวิธีการได้สองแบบคือ
·       สร้างคลาสขึ้นมาใหม่โดยไม่อ้างอิงกับคลาสเดิมที่ชื่อ student
·       สร้างคลาสที่สืบทอดมาจากคลาสเดิมที่ชื่อ Student

รูปแบบหลักการของการสืบทอด
Student
-Id : String
-name : String
-gpa : double
-minGPA : double = 2.00


S1 : Student
-theisTitle : String
-supervisor : String


                คีย์เวิร์ด protected
Ø คุณลักษณะหรือเมธอดของ superclass ที่มี modifier เป็นแบบ private จะทำให้ subclass ไม่สามารถที่จะเรียกใช้ได้
Ø ภาษาจาวากำหนดให้มี access modifier ที่ชื่อ protected ซึ่งจะทำให้ subclass สามารถเรียกใช้เมธอดหรือคุณลักษณะของ superclass ได้
Ø ตัวอย่างเช่น
Protected  String  name  ;

                คลาสที่ชื่อว่า Object
Ø ภาษาจาวาได้กำหนดให้คลาสใดๆสามารถจะสืบทอดคลาสอื่นได้เพียงคลาสเดียวเท่านั้น
Ø คลาสทุกคลาสในภาษาจาวาถ้าไม่ได้สืบทอดจากคลาสใดเลยจะถือว่าคลาสนั้นสืบทอดจากคลาสที่ชื่อ Object
Ø ตัวอย่างเช่น
public  class  Student  extends  Object  {
                .  .  .
}
Ø คลาสที่ชื่อ Object จะมีเมธอดที่สำคัญคือ
public  String  toString ()
                และ        public  boolean  equals (Object  o)
               
                ตัวอย่างการสืบทอดที่ไม่ถูกต้อง
Ø เราสามารถที่ตรวจสอบหลักการของการสืบทอดด้วยคำว่า is a
public  class  Shirt  {
char  size  ;
float  price  ;
                                 }
public  class  Skirt  extends  Shirt  {
                boolean  long  ;
}
                ตัวอย่างการสืบทอดที่ถูกต้อง
public  class  Chothing  {
char  size  ;
float  price  ;
                                 }
public  class  Shirt  extends  Chothing    {
}
public  class  Skirt  extends  Chothing    {
                boolean  long  ;
}
                การเขียนโปรแกรมโดยใช้หลักการของการมีได้หลายรูปแบบ
Ø การมีได้หลายรูปแบบหมายถึง คุณลักษณะของออปเจ็คของคลาสที่ต่างกัน สามารถตอบสนองต่อเมธอดเดียวกันในวิธีการที่ต่างกันได้ ซึ่งหมายถึงการเขียนเมธอดแบบ overridden และการใช้ Dynamic Binding
Ø การเขียนเมธอดแบบ overridden มีข้อกำหนดดังนี้
·       จำนวนและชนิดข้อมูลของ argument จะต้องเหมือนเดิม
·       ชนิดข้อมูลของค่าที่ส่งกลับจะต้องเหมือนเดิม
·       Access modifier จะต้องไม่มีระดับต่ำกว่าเดิมอาทิเช่น ถ้าเมธอดเดิมเป็น public จะไม่สามารถเปลี่ยนเป็น private ได้

คีย์เวิร์ด super
Ø super เป็นคีย์เวิร์ดที่ใช้ในทางการอ้างอิง superclass เพื่อที่จะเรียกใช้เมะอดหรือ constructor  ของ superclass  โดยมีรูปแบบคำสั่งดังนี้
                 super.methodName ([arguments])
Ø ตัวอย่างเช่น คลาส Gradstudent อาจมีเมธอดที่ชื่อ showDetails () โดยมีคำสั่งที่เรียกใช้เมธอด showDetails () ของคลาส Gradsyudent
                 public  void  showDetails ()   {
                                super.showDetails ()  ;
                                showThesis ()  ;
                 }

                Dynamic Binding
Ø ข้อดีของการมีได้หลายรูปแบบอีกประการหนึ่ง คือการที่สามารถกำหนดออปเจ็คได้หลายรูปแบบ ตัวอย่างเช่น จากรูปแบบ
                 SuperClass  obj  ;
Ø เราสามารถที่จะสร้างออปเจ็คที่ชื่อ obj ซึ่งอาจเป็นออปเจ็คของคลาสที่เป็น superclass หรือที่เป็นsubclass ได้ โดยใช้คำสั่งที่มีรูปแบบดังนี้
obj  =  new  SuperClass ()  ;
                หรือ         obj  =  new Subclass  ()  ;
Ø ตัวอย่างเช่น
                 Student  s  ;
                 s  =  new  GradStudent () ;

Constructor
Ø construtor เป็นเมธอดที่ชื่อเดียวกับชื่อคลาส ซึ่งมีรูปแบบดังนี้
                 [modifile]    ClassName ([argument])  {
                                [Statements]
                 }
Ø construtor เป็นเมธอดที่ไม่มีค่าที่จะส่งกลับแต่ไม่ต้องระบุคีย์เวิร์ด void
Ø โดยทั่วไปคลาสทุกคลาสจะมี default constructor ซึ่งมีรูปแบบดังนี้
                 Public  ClassName ()  {
                 }
Ø เราสามารถที่จะเขียน constructor ในคลาสตใดๆขึ้นมาก็ได้
Ø Default constructor จะหายไปเมื่อมีการเขียน constructor ขึ้นใหม่

คำสั่ง new ()
Ø มีขั้นตอนการทำงานดังนี้
·       กำหนดเนื้อหาที่ในหน่วยความจำให้กับออปเจ็ค
·       กำหนดค่าเริ่มต้นให้กับคุณลักษณะของออปเจ็ค
·       กำหนดค่าของคุณลักษณะของออปเจ็คตามคำสั่งกำหนดค่าที่ประกาศไว้
·       เรียกใช้ constructor
Ø ตัวอย่างเช่น
                 Public  class MyDate  {
                                private  int  day  = 1 ;
                                private  int  month  = 1 ;
                                private  int  year  = 1 ;
                                publice  MyDate  (int  m , int y)  {
                                                day  =  d  ;
                                                month  =  m  ;
                                                year  =  y  ;
                                }
                                 }

         รูปแสดงตัวอย่างการทำงานขั้นตอนคำสั่ง new
Ø คำสั่ง     
MyDate d1  =  new  MyDate (16,8,1972)  ;

ยังไม่ได้ใส่รูป

Constructor  และ Overloaded

Ø เราสามารถที่จะสร้าง constructor แบบ Overloaded ของคลาสได้
Ø constructor แบบ Overloaded จะมีจำนวนหรือชนิดข้อมูลที่แตกต่างกันของ arguments
Ø คำสั่ง new ที่ใช้ในการสร้างออปเจ็คจะเรียกใช้ constructor คือทำให้เราสามารถที่สร้างออปเจ็คเริ่มต้นได้หลายรูปแบบ
Ø ข้อดีของการสร้าง constructor แบบ Overloaded คือทำให้เราสามารถที่สร้างออปเจ็คเริ่มต้นได้หลายรูปแบบ
Ø เมธอดที่ชื่อ this () เป็นการเรียกใช้ constructor ของคลาสตัวเอง โดยจะต้องเป็นคำสั่งแรกสุดที่อยู่ใน constructor แบบ Overloaded


คลาสแบบอื่นๆที่สำคัญ
Ø คลาสแบบ final
·       คลาสที่มี modifile จะหมายความว่าคลาสนั้นไม่สามารถสืบทอดได้
·       ตัวอย่างเช่น
Public  final class  String  {
                .   .   .
}
Ø คลาสแบบ abstract
·       คลาสที่มี modifile เป็น abstract จะหมายความว่าคลาสนั้นยังเป็นคลาสที่ไม่สมบูรณ์ โดยมีเมธอดแบบ abstract อยู่อย่างน้อยหนึ่งเมธอดซึ่งรูปแบบการประกาศดังนี้
[modifile]  abstract  return_type  mrthodName ([arguments] )  ;
·       เราไม่สามารถที่จะสร้างออปเจ็คของคลาสแบบ abstract ได้
               
                อินเตอร์เฟส
Ø อินเตอร์เฟส (interface) ลักษณะคล้ายกับคลาสแบบ abstract แต่จะประกอบด้วยเมธอดที่ยังไม่สมบูรณ์เท่านั้น โดยมีรูปแบบดังนี้
                 [modifile]  interface  InterfaceName   {
                                [methods  () ; ]
                 }
Ø อินเตอร์เฟสกำหนดขึ้นมาเพื่อให้คลาสอื่นนำไปใช้งานโดยใช้คีย์เวิร์ด implements
Ø อินเตอร์เฟสจะเหมือนกับคลาสแบบ abstract ตรงที่เราจะไม่สามรถสร้างออปเจ็คของอินเตอร์เฟสได้
ภาษาจาวากำหนดให้คลาสใดๆสามารถ implements อินเตอร์เฟสได้หลายอินเตอร์เฟส


รับเขียนโปรแกรม Android Application และสอนการเขียนโปรแกรม สอน online ได้

อดุลย์ 081-6452400  e-mail fongwe_a@hotmail.com  

more info about Android Development
http://androiddevelopersthai.blogspot.com/